City of Tulsa GIS Booth Materials
A fairly quick set of materials developed to help layout a booth for GIS day at the local community college.
Brochure
The Local Community College (Tulsa Community College) was celebrating GIS Day and asked if we would be interested in having a booth. In order to prepare I was asked to develop a brochure and a display panel for our table. This was the brochure.

Page 1 of the Brochure. The middle section on this page was an aerial photo that I exported from ArcMap and modified in Photoshop. After creating the two map pins featured in this middle section it was decided to create a version where we can replace TCC with an icon for... "Your Future" (or something similar) in order to make a more generic option for brochure usage at various events. The large, opaque blue-tinted box is displaying the City of Tulsa Street file exported from ArcMap as an Adobe Illustrator file and cleaned up and modified. All styling was done in AI in order to get a final product EXACTLY as desired. The logo on the bottom left of the far-right panel was an idea I've been working on for a GIS logo for our GIS group. It's a gear breaking out of an egg-like planet earth / globe. The urls for the various maps were born more of a desire to fill the left panel. The QR code was a neat addition that InDesign offers.
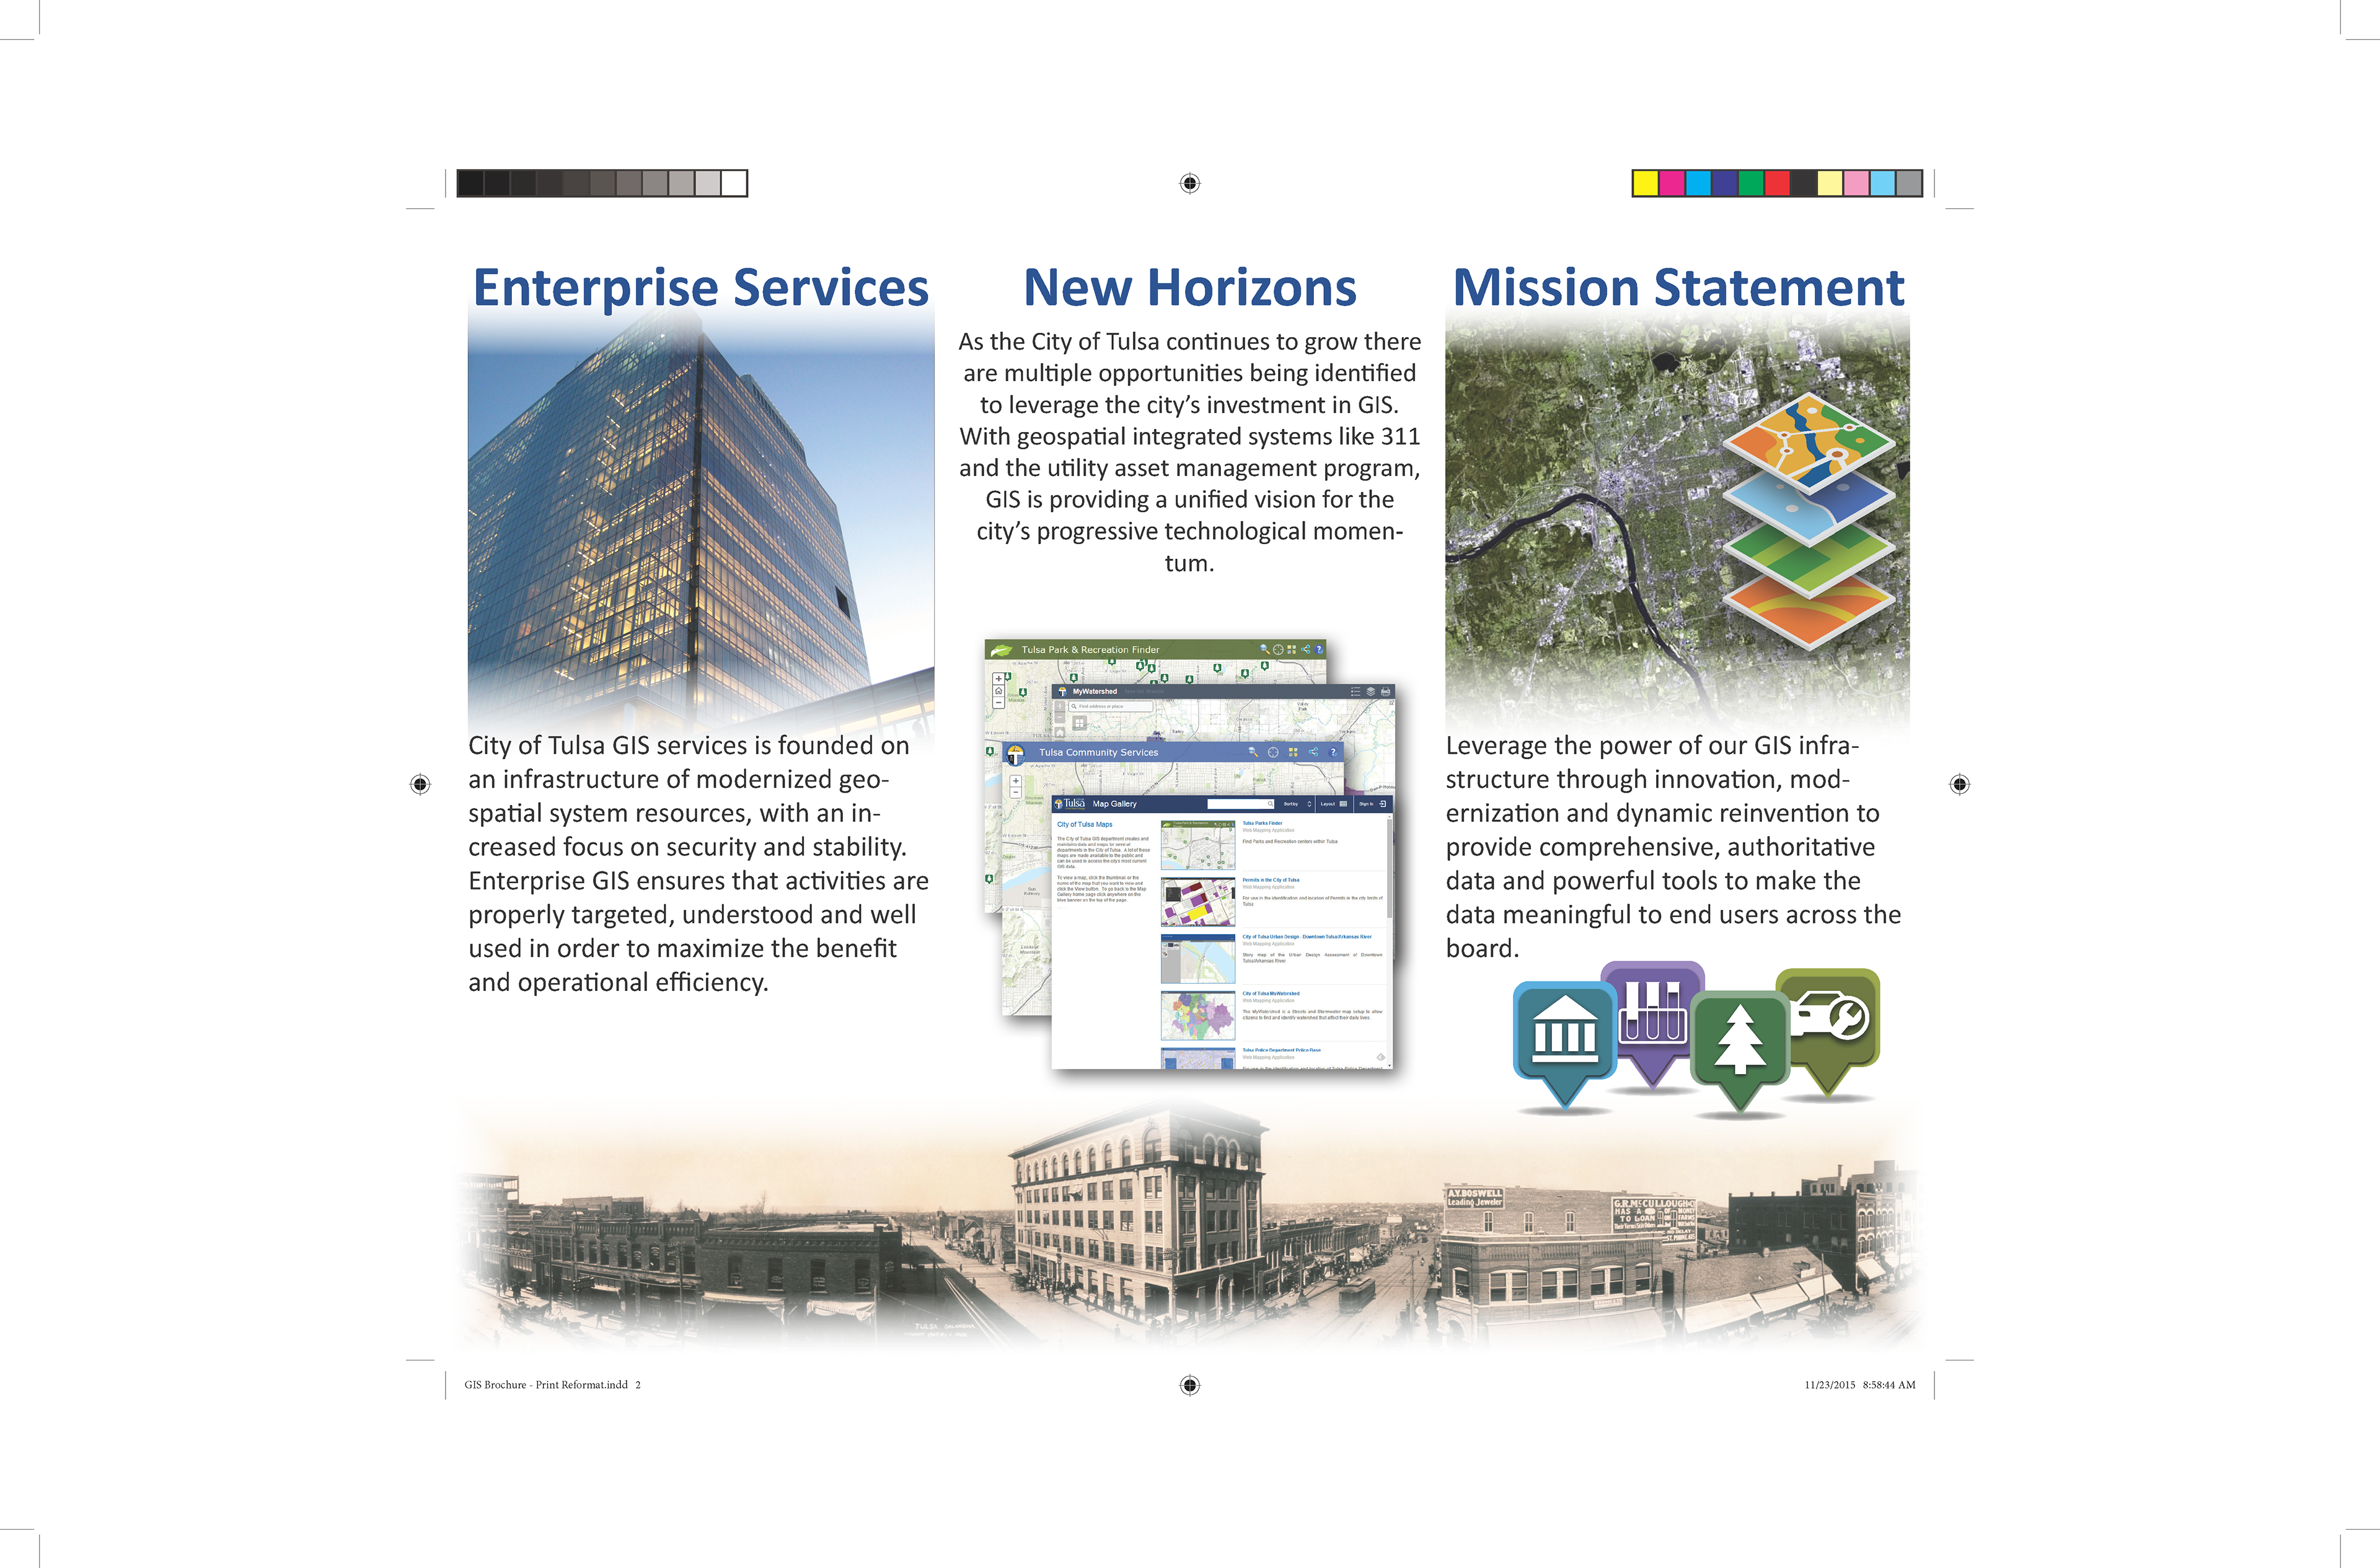
Page 2 of the Brochure. The left panel has a nice photograph of the City of Tulsa, City Hall. The middle panel includes some screenshot images with minor drop-shadow effects added to keep the overall look of the brochure. The right panel was my favorite. ESRI makes several flat 2D images that I used as an idea to build replicas of in Adobe Illustrator. After building them, I applied a 3D effect, set a consistent angle, and drop-shadow'ed them all. They sit on a satellite photo of Tulsa. Underneath them are some icons I put together in AI based on earlier 2D concepts. I've been waiting for Adobe CC at work in order to create more professional icons for our maps and map layers so this was a lot of fun to do. The image across the bottom is a panoramic photo from the 20's with minor photoshop adjustments.
Display Panel
After having a week to develop and work on this brochure (while working on various other GIS-related projects) I had to develop a 36 x 48 Tri-Fold Display Panel ( it has to fit this ). I had two days to make this part of the booth come together. Needless to say it wasn't finished the way I wanted to make it. But it still turned out pretty good.
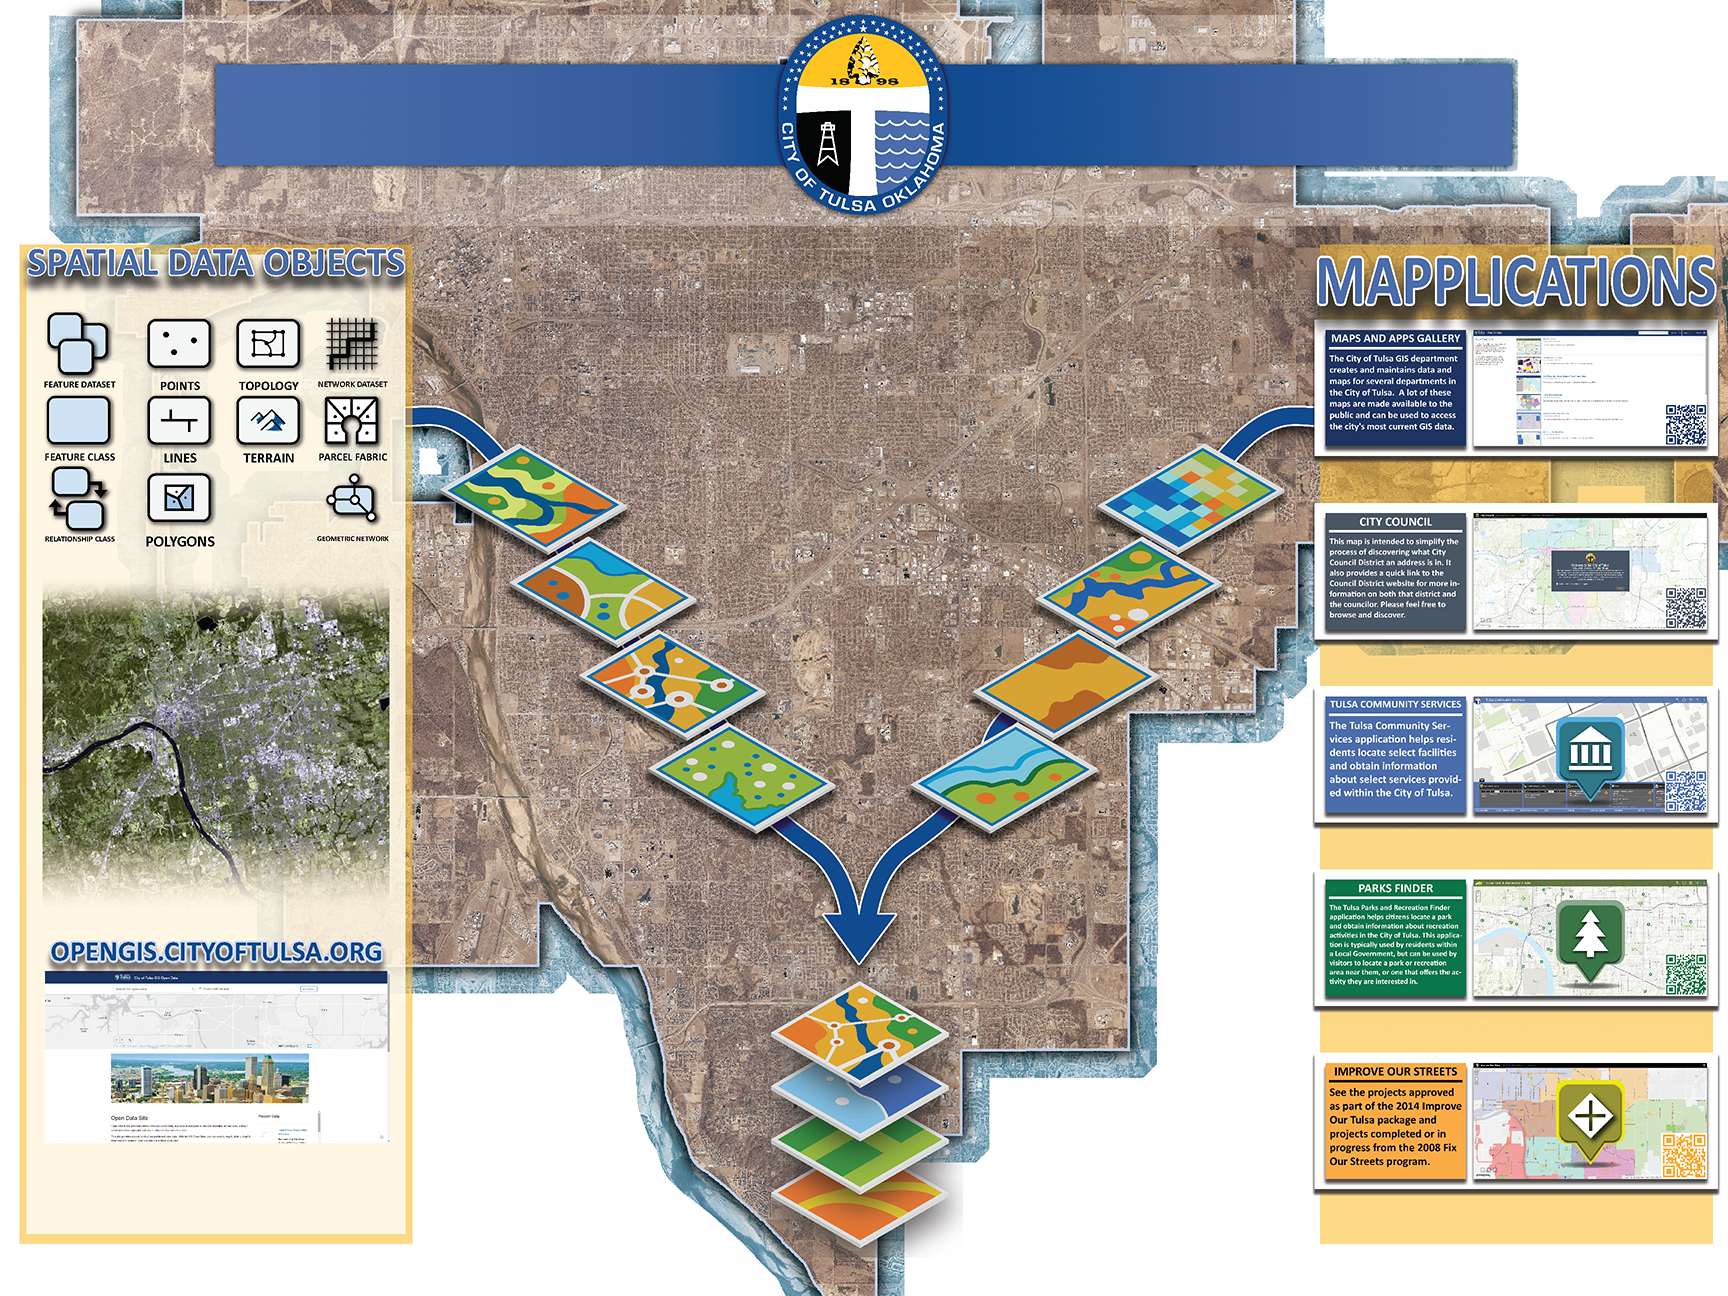
Display Panel. This document was a large undertaking with only two days to work on it. I reused a lot of things. I learned about Photoshop PSB (Photoshop Large Filetypes) as my PSD grew to over 2 gb quite quickly. The initial outlined boundary of Tulsa was created in ArcMap and exported where I processed it in Photoshop CC from there. Adding a boundary, drop shadow, etc gave it a nice effect. I then took a more full aerial photograph of the area and processed that in Photoshop CC as well. I tinted it blue, snipped it to 100-150 feet from the edge of the boundary. I would have preferred to have a more complete aerial for that would fill out the whole board, but we do not have that complete of an aerial set. On the left side I converted some Google Drawing creations icons that I developed into more full featured images via Illustrator CC. I reused the satellite photo here, and included a screenshot of our Open GIS Initiative page. In the middle section I was attempting a much larger goal that time made impossible. I went with more of these tiles based on concepts ESRI uses in it's documentation. The right panetl includes a Smart Object I created and re-used modularly. Each object was exported as a 'block' to an external file from being a Smart Object. Then I could create a new 'block' by 'New Smart Object via Copy' allowing me to just 're-link' each object to a replacement file for each piece: Map Screenshot; QR code block; Text block; etc. Then I centered the City logo against a gradient bar using the color palette from the official City of Tulsa Branding guide.
Overview
This is, probably, the first piece I've done using multiple applications. I've tried to not restrict myself to any single Adobe Product in my knowledge grabbing. I've taken classes and training in literally every application Adobe makes for their Creative Cloud Library. I have a personal CC Student License but I created all of this with my Team License that work purchased for me. Seeing each piece brought together with confidence was really nice. I still need to update the Display Panel to more fully complete the middle section. I need to re-think and develop the left section. The middle panel has a processing goal to show how our data comes from and through Citizens to Inner Departments to come out to our web maps.